How to - Set Creation & Adding Coins to Sets
It is important to note that in order to create a set in MyCollect, coins must first be added to your inventory page and then allocated to individual sets, in this easy-to-understand tutorial we will be adding coins to your inventory.
1. Navigation
Navigation Method #1: Quick Add (Menu Bar)

(In the top left side of the menu bar you will see a quick action drop down menu, from there you will find links to quickly add sets and inventory)
Navigation Method #2: My Sets Page

(The second method to add inventory is on the left hand navigation, you will find your “My Sets” page)
2. Create & name your set
After following one of the navigation methods above you will be taken to the Add Inventory screen/page. From here we will follow these steps:
-
Name and Save your Set
-
Allocating your coins (inventory items) to your set
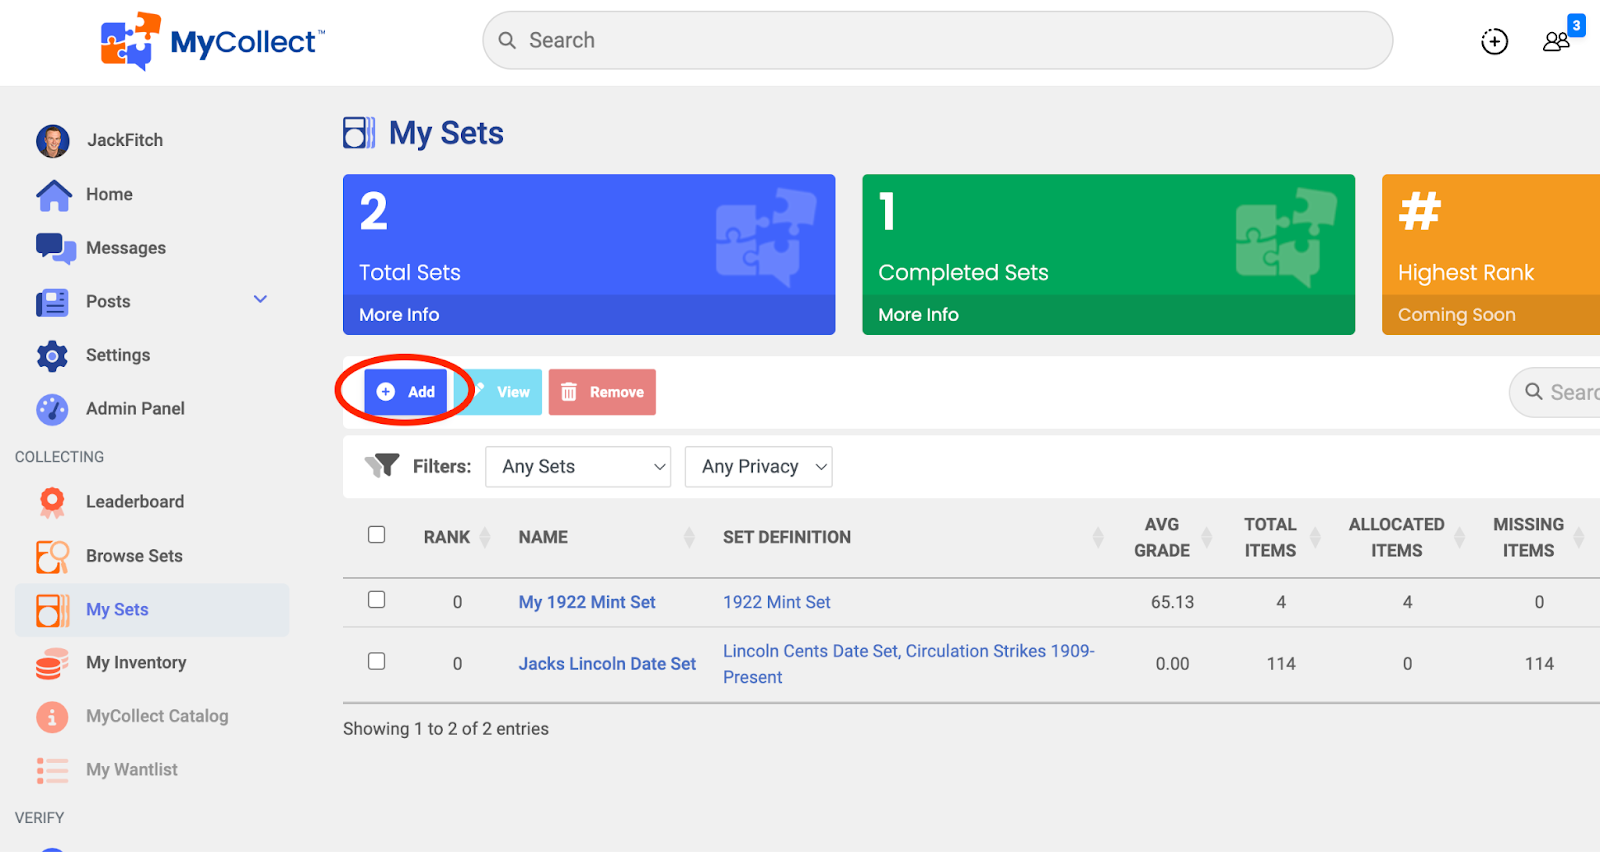
(From here, you will see an “Add” button, this will take you to a list view of sets you are eligible for based on your current inventory)
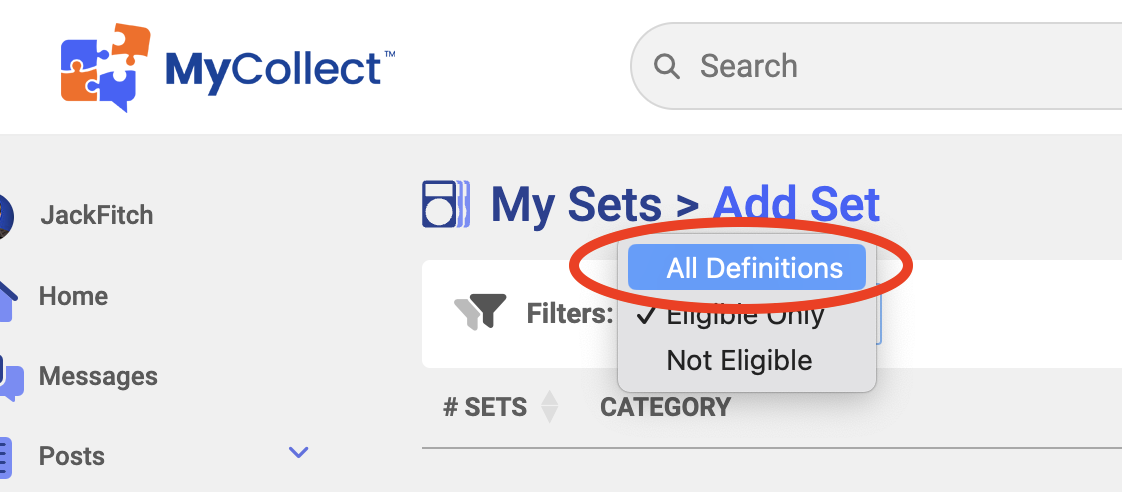
(To view sets you may not qualify for, select “All Definitions” from the dropdown filter in My Sets)
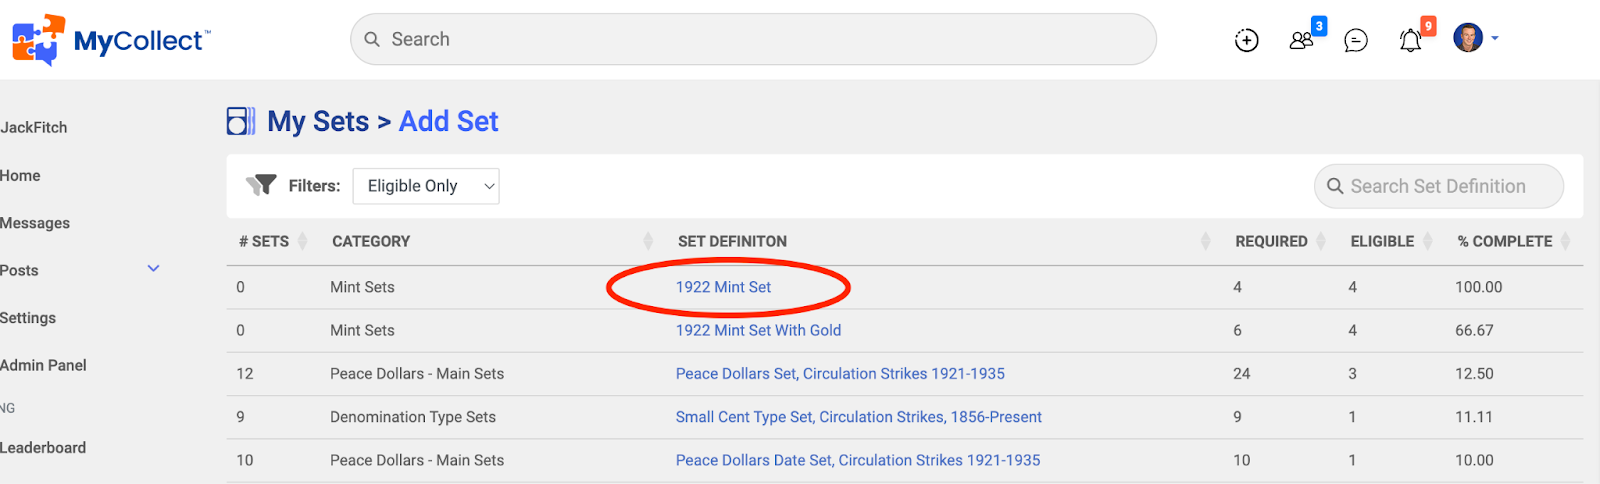
(Once finding a set you are eligible for and want to start, click the blue definition link of the set to begin to customize your set)
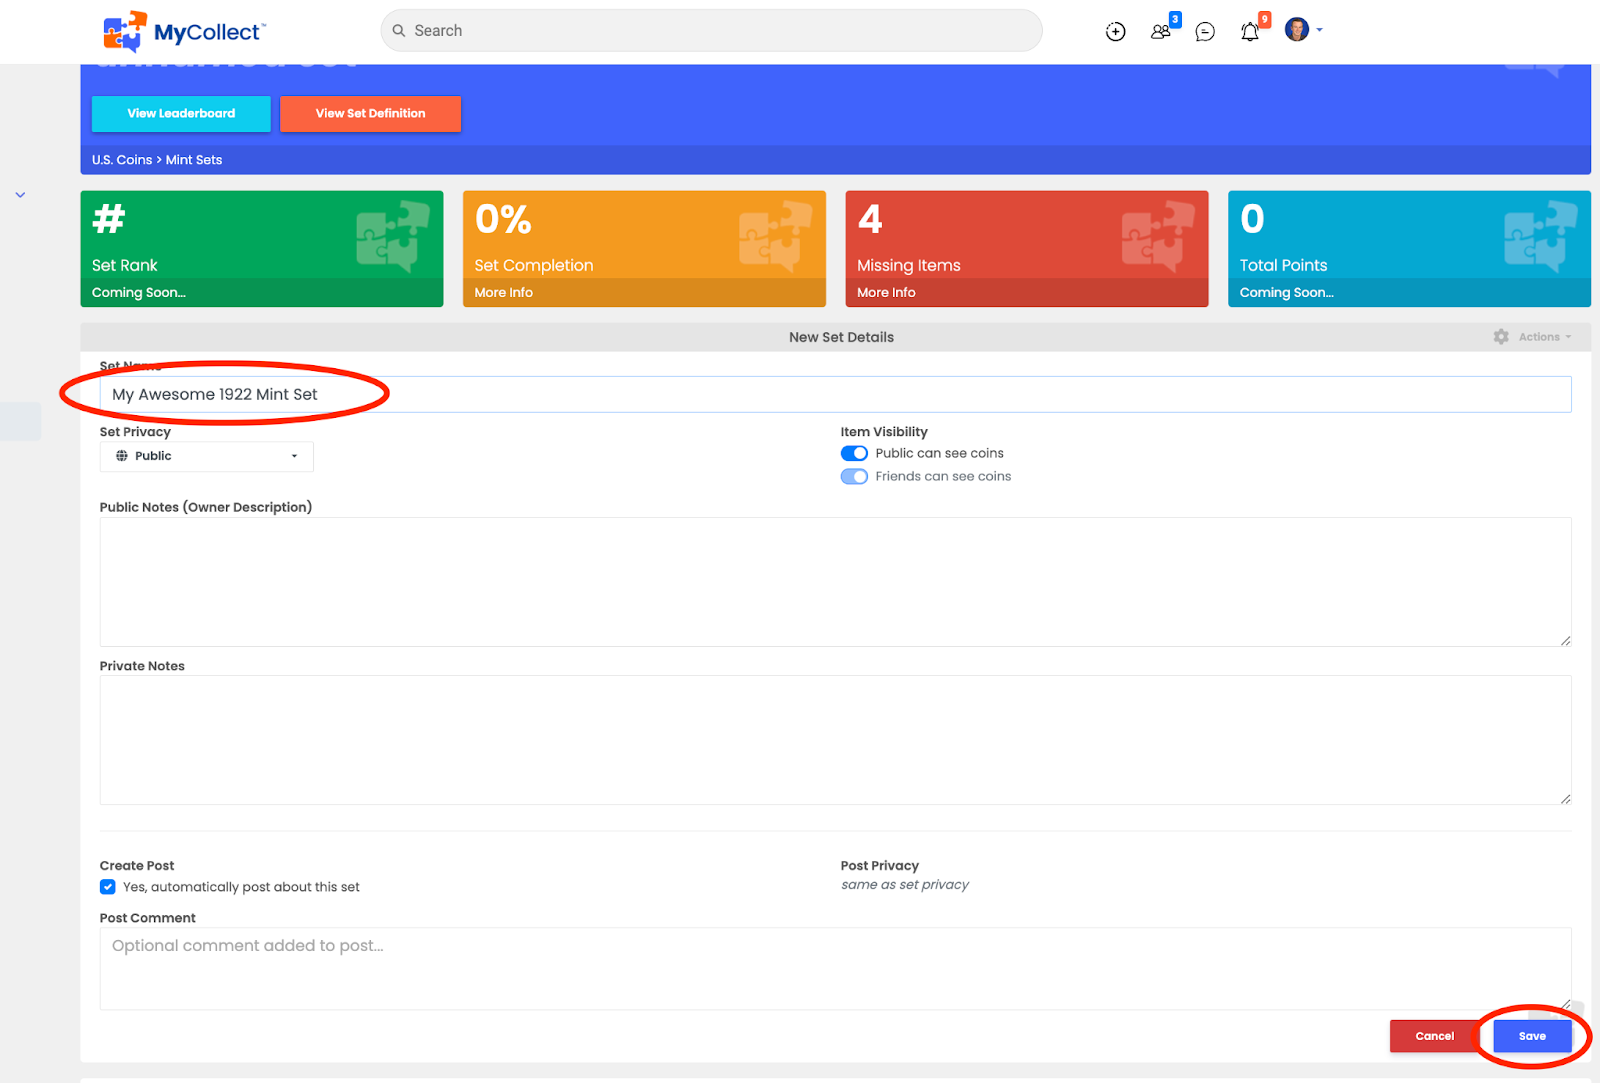
(Now let's name and save our set.)
2. Add your coins to your set!
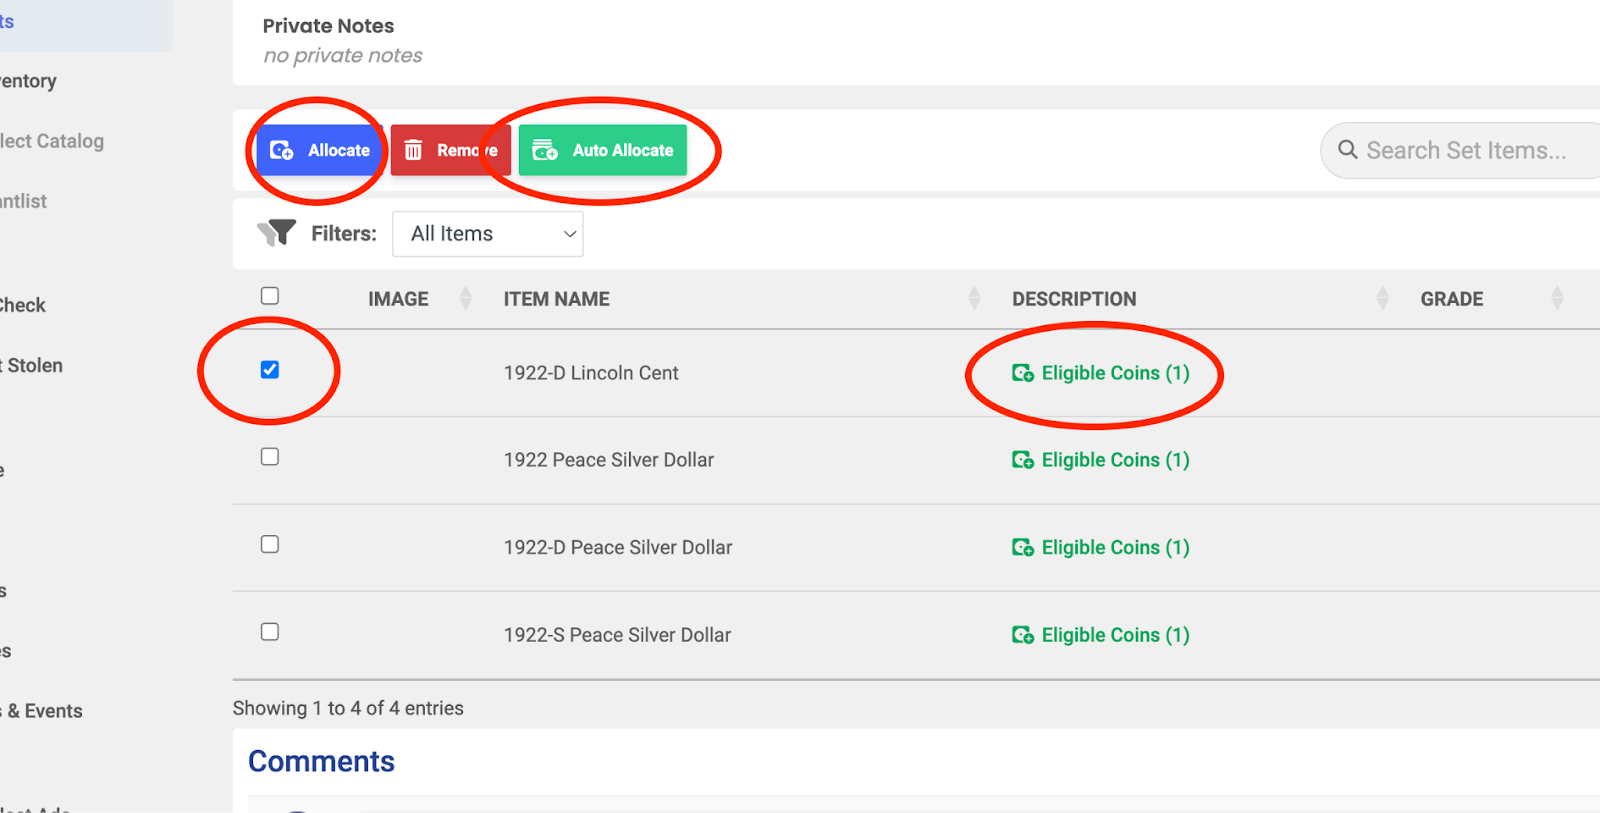
(After your set is saved you will see at the bottom of of the set page the ability to allocate specific coins from your inventory, or auto-allocate all of your eligible inventory to your set. The three methods for allocating are, 1. Selecting the green link and adding the eligible coins you want in your set. 2. Selecting the individual Item Name checkboxes and then adding them via the blue “Allocate” button. 3. The green Auto-Allocate button, which will automatically allocate the appropriate coins to your set!)
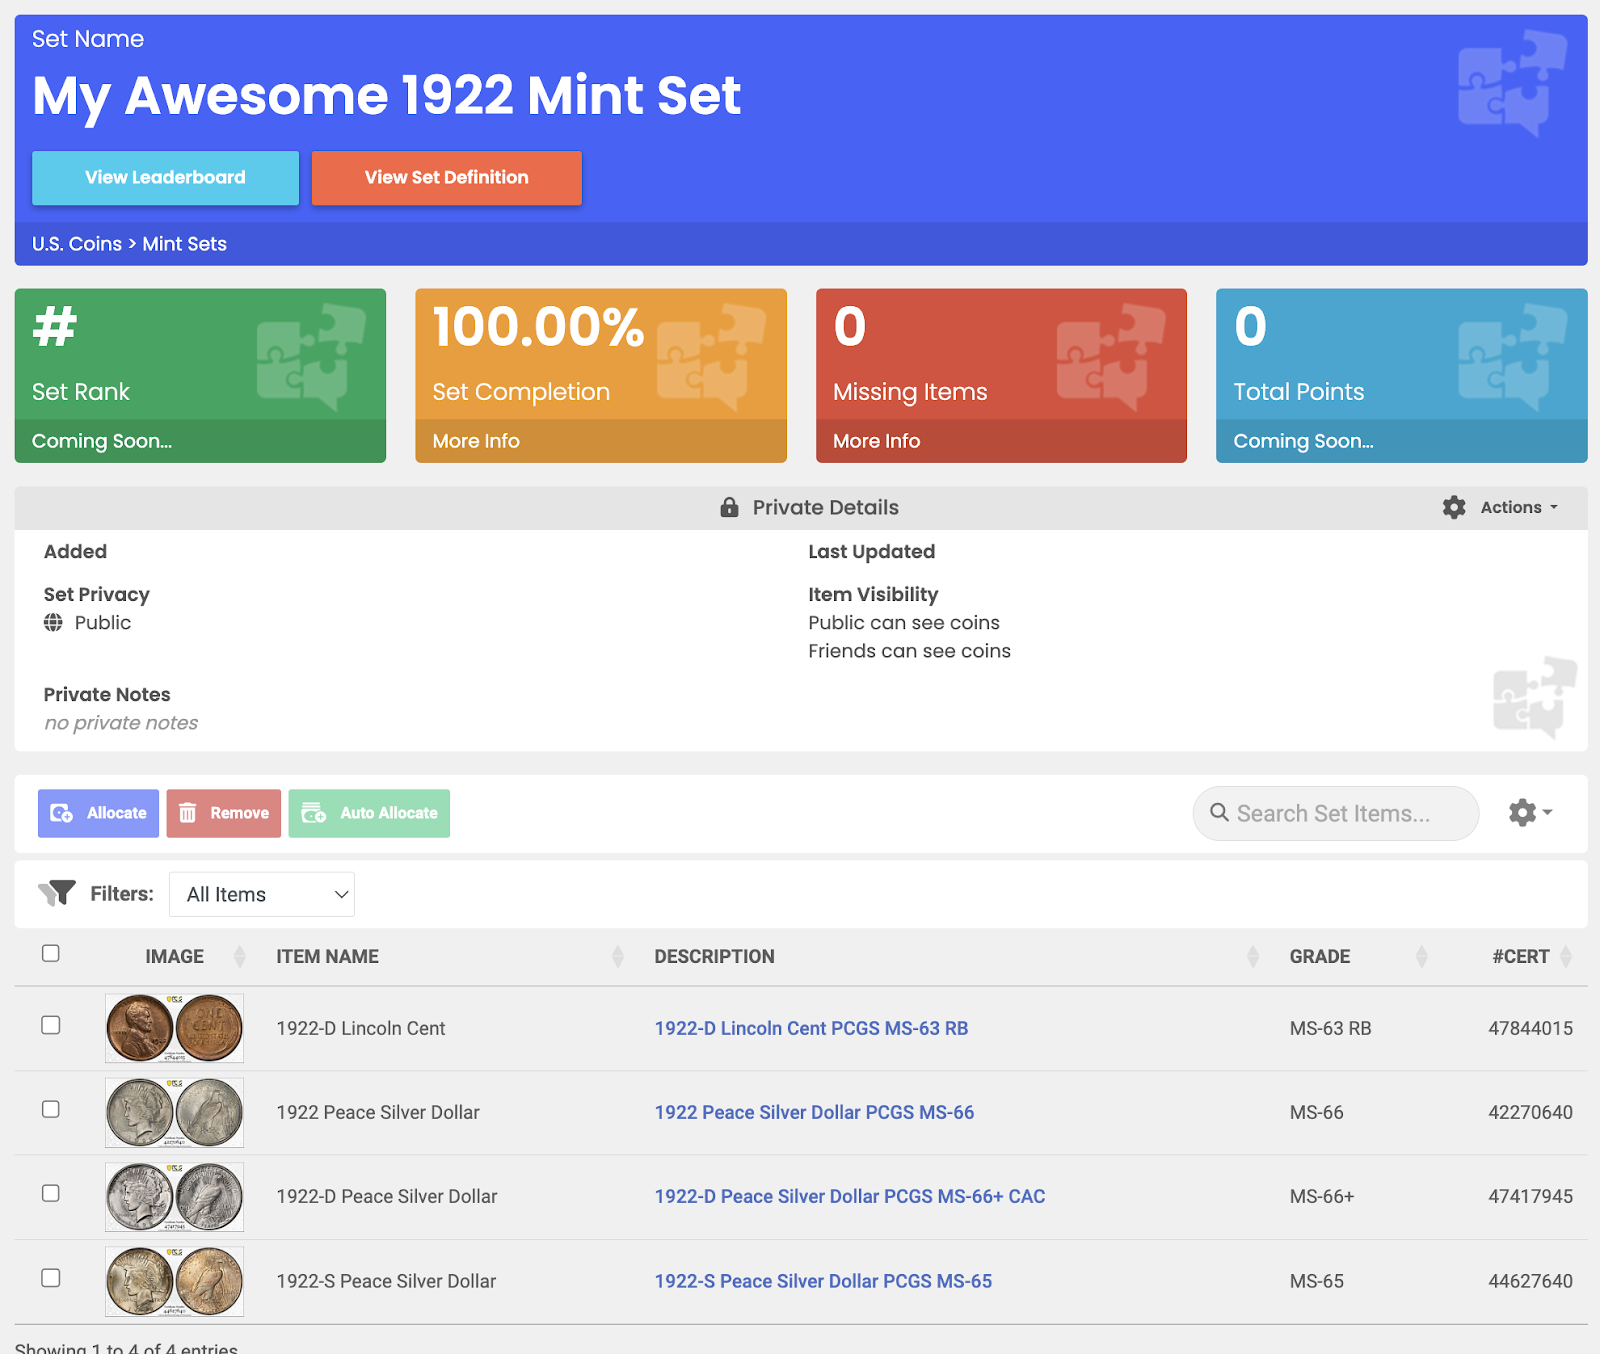
Done! You have now created your first set!